Tips for Designing Fall Arrangements
Even though fall arrived a few weeks ago, I for one still don’t feel like fall is here until October arrives. Or maybe I just need a little cool weather and a few carved pumpkins to feel “a touch of fall in the air.”
Then I remember one of my favorite containers that artfully celebrates fall. That helps me think “fall”. It is a green ceramic pedestal container. Its shape is slightly oval, about 12” across at the widest part of the oval, and 9” across the narrower part…thus the oval shape. As an empty container, it stands about 6” tall. On each end of the container, the potter has added a ceramic motif of oak leaves and acorns, taking artistic license to color the oak leaves maroon, but leaving some of the leaves’ edges in unpainted bisque.
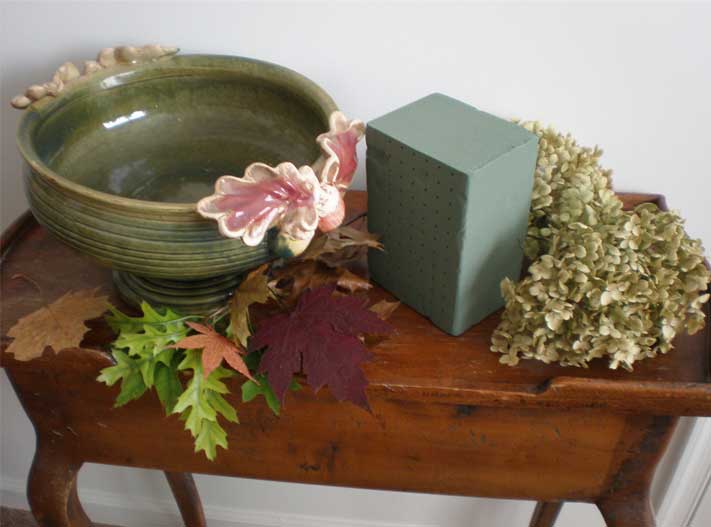
I decided to use a combination of dried and fresh materials to create a floral design that seems well suited for this pedestal container. A dear friend shared her beautiful dried green hydrangeas with me! Each hydrangea was easily 6”-7” in diameter. And another friend allowed me to harvest leaves that were turning from green to beautiful shades of deep reds, rust, and maroons!
I started with 2/3 of a block of wet floral foam placed lengthwise in the container. Next, I anchored the floral foam in the container with a strip of ¼” clear oasis brand tape stretched across the top of the foam from one side to the other. (Regular clear Scotch tape works also.) With the proper mechanics (taping the wet floral foam securely in place), I am ready to insert the ends of the hydrangea stems into the floral foam. I have five dried hydrangeas to work with and lots of colorful real fall leaves.
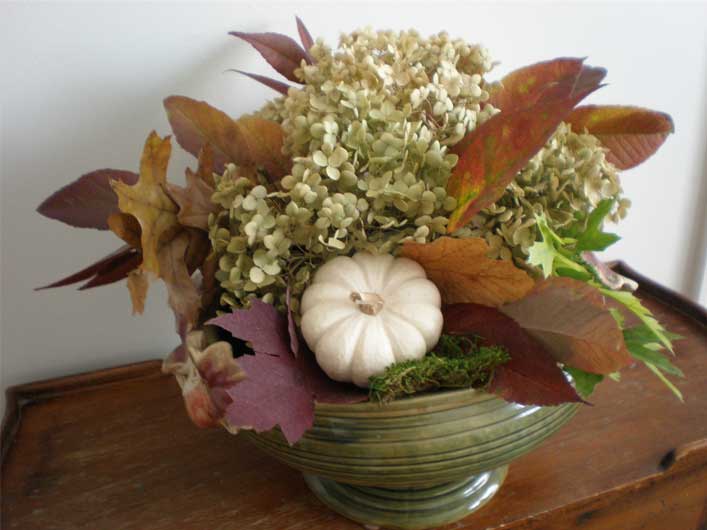
My design is intended to be a mound shape, with the fall leaves adding a degree of lightness to what otherwise could be a heavy look. To create the mound shape, the tallest hydrangea is about 7” above the rim of the container. The other four hydrangeas are inserted around the center hydrangea, along with a mini white pumpkin. The four hydrangeas and the white pumpkin all rest on the rim of the pedestal container. Now all the design needs is the addition of the fall leaves and a small piece of sheet moss under the mini pumpkin!
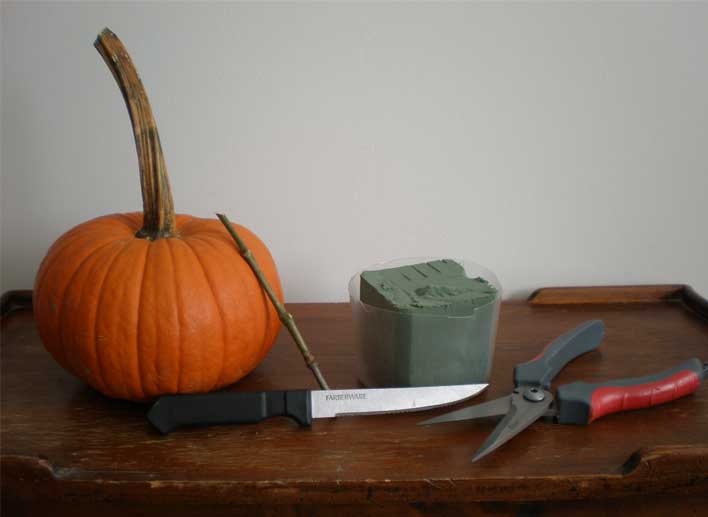
And a 6.5” orange pumpkin awaits, ready to become a part of a charming fresh fall decoration. It has been washed and hollowed out and is ready to proudly hold fresh flowers.
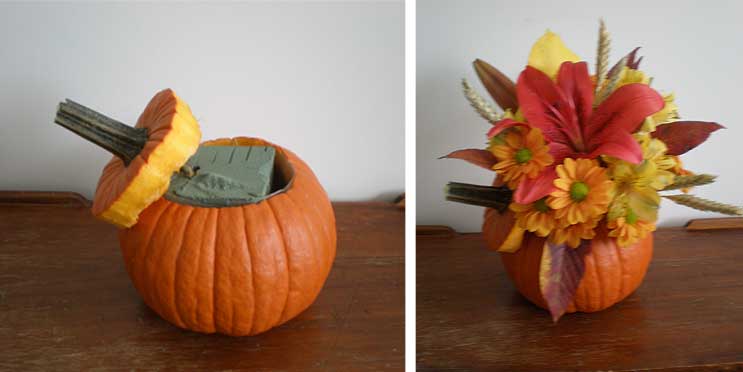
Use a clear plastic deli container to hold the wet floral foam. I was able to use a pint container, but had to cut down the sides for it to hold 1/3 of a block of wet floral foam. You will need a knife to cut the foam and a pick to anchor the top of the pumpkin into the wet floral foam. For flowers, I have used one large orange lily (plus a lily bud); 3 stems of yellow alstromeria; and 2 stems of pale orange daisy mums. A few stems of rye add to the fall look, especially after the colorful real leaves are added.
I hope that you decide to try your own style of fall flowers inside a pumpkin, or that you have a special container that you would like to fill with dried or fresh flowers. Most of all, please enjoy the creative experience and the beauty of flowers!
by Evelyn Kinville, Behnke’s Garden Blogger
Comments (0)