Care of Azaleas & Rhododendrons
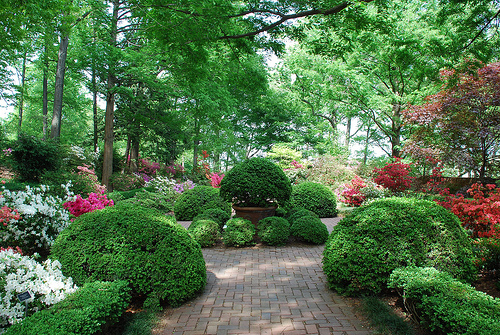
Azaleas and rhododendrons belong to the same genus of plants and have the same cultural requirements in our region. The spectacular display every spring at home after home attests to the fact that they may be easily grown if you pay attention to the basic needs of the plants. Proper site selection, soil preparation, planting, watering, fertilizing, and pruning will ensure that your plants will be healthy and provide exceptional beauty for many years.
Plant Selection
When selecting azaleas and rhododendrons, be sure to consider their flower color and ultimate size. When deciding on a planting location, consider how the colors of the flowers relate to the color of your home, each other, and the rest of the garden. Make sure that the planting site allows for the ultimate size of the plant.
Site Selection
Azaleas and rhododendrons do best when protected from direct, afternoon sun. They do well when planted under the light shade of tall trees, or on the north or northeast side of a building. When planted in full sun, even if well watered, the plants will often suffer from devastating attacks by insects called lace bugs.
Winter Wind
Large-leafed rhododendrons will need protection from strong winter winds. Locating plants away from the west side of a building will help, but spraying with an antidesiccant such as Wilt Pruf® or building a winter-wind screen for exposed plants will help prevent winter damage to the foliage.
Soil Preparation
Azaleas and rhododendrons prefer a moist, well drained, acidic soil with a pH between 4.5 and 5.5. If your soil drains poorly, mix the existing soil with equal parts of Fafard Ultra Outdoor Planting Mix and organic matter such as peat moss, fine pine mulch, or composted oak leaves.
Planting
Dig a hole, with sloped sides, three times as wide as the root ball. The hole should be no deeper than the root ball and when the root ball is placed in the hole, it should sit slightly above ground level. The soil directly beneath the root ball should not be disturbed and should be tamped down to prevent the root ball from sinking too deeply when the soil settles. Roughen the sides of the hole to prevent a glazing effect that could inhibit the roots from penetrating into the existing soil.
If the azalea or rhododendron is in a container, remove it from the container and untangle any matted roots with a 3-pronged cultivator or make 4 slashing cuts from the top to the bottom of the root ball. This will encourage the development of a healthy root system.Many azaleas and rhododendrons are purchased as ball and burlapped plants. The hole for these plants should be prepared the same way as with container-grown plants.
After placing the plant in the hole, make sure the root ball is slightly above ground level and then remove any rope or twine holding the burlap around the root ball. The burlap should be pulled away from the top and sides of the root ball and covered completely with soil.After properly positioning the azalea or rhododendron in the planting hole, backfill around the root ball with the improved soil mixture, pack the soil firmly, and water thoroughly. Construct a shallow basin of mulch around the planting hole about 2 to 3 inches high so that water can be applied directly to the root ball. Finally, apply 2 to 3 inches of mulch on the planting site. Do not pile mulch against the trunk of the plant.
Watering
Azaleas and rhododendrons have shallow root systems. Two to 3 inches of mulch around the plants will help keep the soil moist. An acid mulch, such as fine pine bark or composted oak leaves, is ideal. Azaleas and rhododendrons must be watered during dry periods, not only in the summer, but also in the fall as they head into winter. This will reduce damage from drying winter winds. Soak the planting area thoroughly, then allow it to dry out for several days to a week before watering again. A Dramm Water Wand® is the best watering tool for spot-watering new plantings and deep soaking older ones.
Fertilizing
Azaleas and rhododendron should be fertilized in late-winter or early spring. We recommend Holly Tone®, an excellent organic fertilizer specially manufactured for acid-loving plants, or Osmocote®, a slow-release granular fertilizer. If you want to give your plants a fast acting fertilizer, you can use Miracid®, which is applied as a liquid, to supplement these other fertilizers.
Pruning
Azaleas and rhododendrons do not need frequent pruning. The plants look best with their attractive natural form rather than artificially shearing them into a formal shape. If needed, they should be pruned shortly after their bloom period has ended, because they set next year’s flower buds on the new branches they grow after flowering.
Insects And Diseases
Lace bugs are a major pest of azaleas and rhododendrons. These insects feed on the undersides of leaves by sucking chlorophyll from the leaf tissue. This causes a white stippling of the leaves. Azaleas and rhododendrons planted in full sun are very susceptible to damaging attacks by these insects. Spraying with horticultural oil or insecticidal soap will control lace bugs. However, when using these products, you must hit the lace bugs on the underside of the leaves with the spray.
Azaleas and rhododendrons are susceptible to a variety of soil borne fungal diseases. The best preventive measure for these potential problems is to make sure you have a well drained, acidic soil. We recommend that you consult with our experts at Behnke’s to help diagnose any pest problems before you apply a pesticide.Behnke’s has an enormous selection of beautifully grown Azaleas and Rhododendrons for you to choose from.
Come and stroll through our Azalea beds, and see for yourself which of the dazzling array of flower colors would be perfect for your yard.

Comments (0)